
[ad_1]
Discover ways to use a pom pom maker with this tutorial! Get straightforward steps to create colourful and fluffy pom poms of all sizes and shapes to your DIY initiatives and decorations.
Abilities Required: None. Even for those who’ve by no means crafted earlier than, you are able to do this mission. You’ll be wrapping yarn on a plastic instrument after which trimming.
Embarking on a crafting journey usually leads us down a path crammed with glitter, glue, and the ever-mysterious yarn entanglements. At present, we’re unraveling one of many coziest mysteries of the DIY universe: tips on how to use a pom pom maker.
Sure, that pleasant little gadget that guarantees to remodel strange yarn into spheres of pleasure. For those who’ve ever discovered your self questioning, “How do you employ a pom pom maker?” you’re not alone.
It’s a query that’s floated by way of the minds of many craft fanatics, proper alongside “Is there such a factor as an excessive amount of glitter?” (Spoiler alert: There isn’t.)
There’s one thing magical about turning easy supplies into one thing that brings smiles and shade into our lives. And let’s be sincere, who doesn’t love an excellent pom pom?
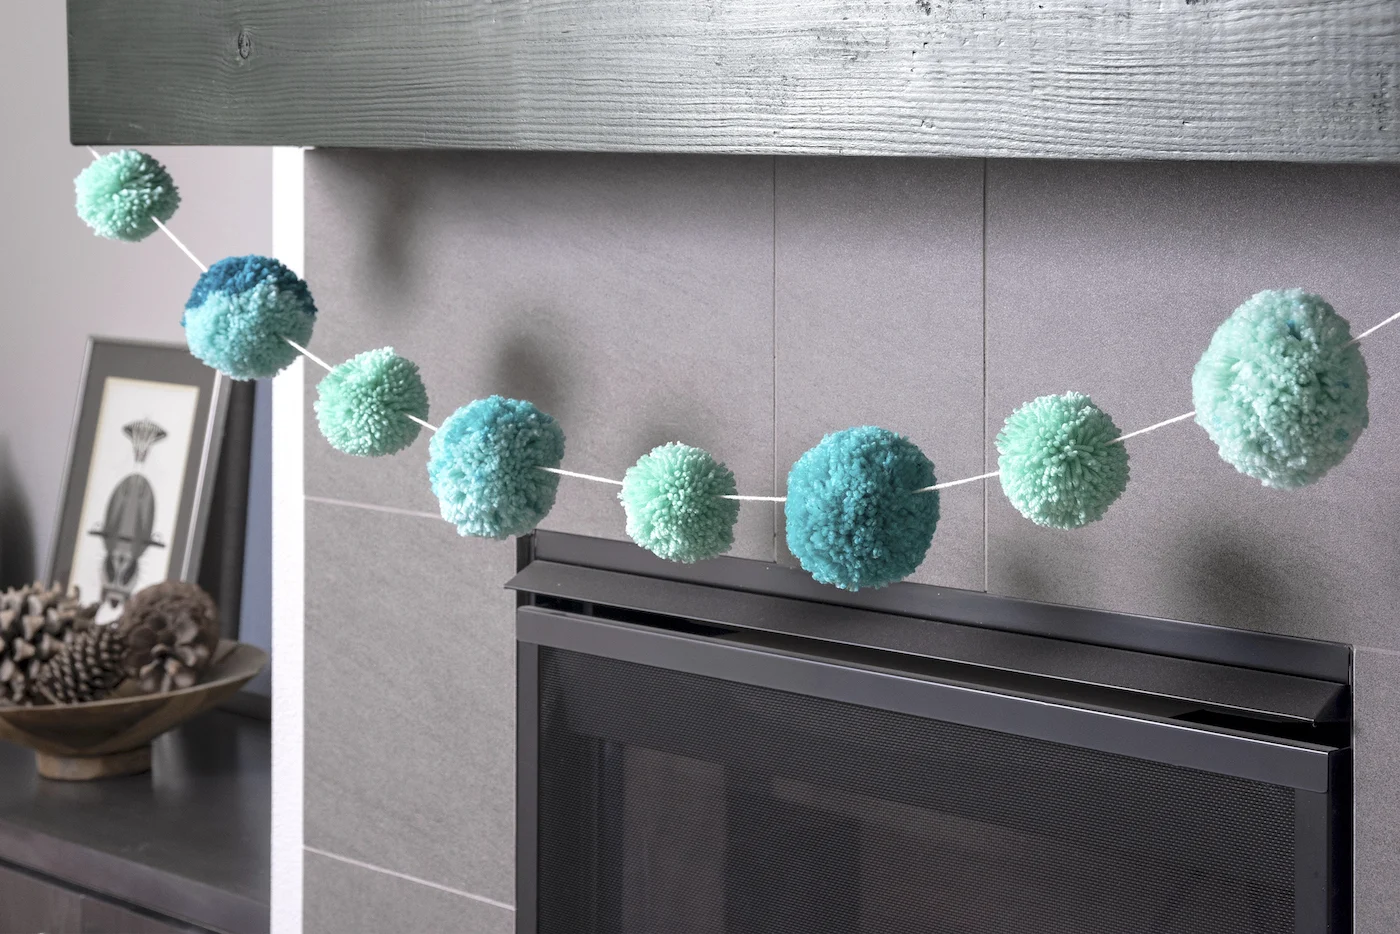
They’re just like the confetti of the crafting world—good for adorning hats, scarves, dwelling decor, and even making appearances at events as cheerful garlands.
However to get from a skein of yarn to a fluffy, completely spherical pom pom, there’s a little bit studying to do.
Enter the plastic pom pom maker, a instrument that may appear a bit quirky at first look however is actually a wand for the modern-day craft wizard. Gone are the times of cardboard circles and uneven trimming.
This nifty machine is right here to streamline your pom pom manufacturing, turning it right into a enjoyable, fuss-free expertise. Whether or not you’re a seasoned crafter or somebody who’s simply beginning out, mastering the pom pom maker is a recreation changer.
On this weblog submit, we’re diving deep into the center of pom pom creation. We’ll stroll you thru the step-by-step strategy of utilizing a plastic pom pom maker, plus there’s a video within the submit that additionally exhibits you tips on how to do it.
So, seize your pom pom instrument, choose your favourite yarn colours (the brighter, the higher!), and let’s embark on this fluffy journey collectively.
By the top of this submit, you’ll be a pom pom-making aficionado, able to sprinkle your world with little balls of happiness. And who is aware of? You may simply end up in search of excuses so as to add pom poms to all the pieces in sight. Let’s get crafting!
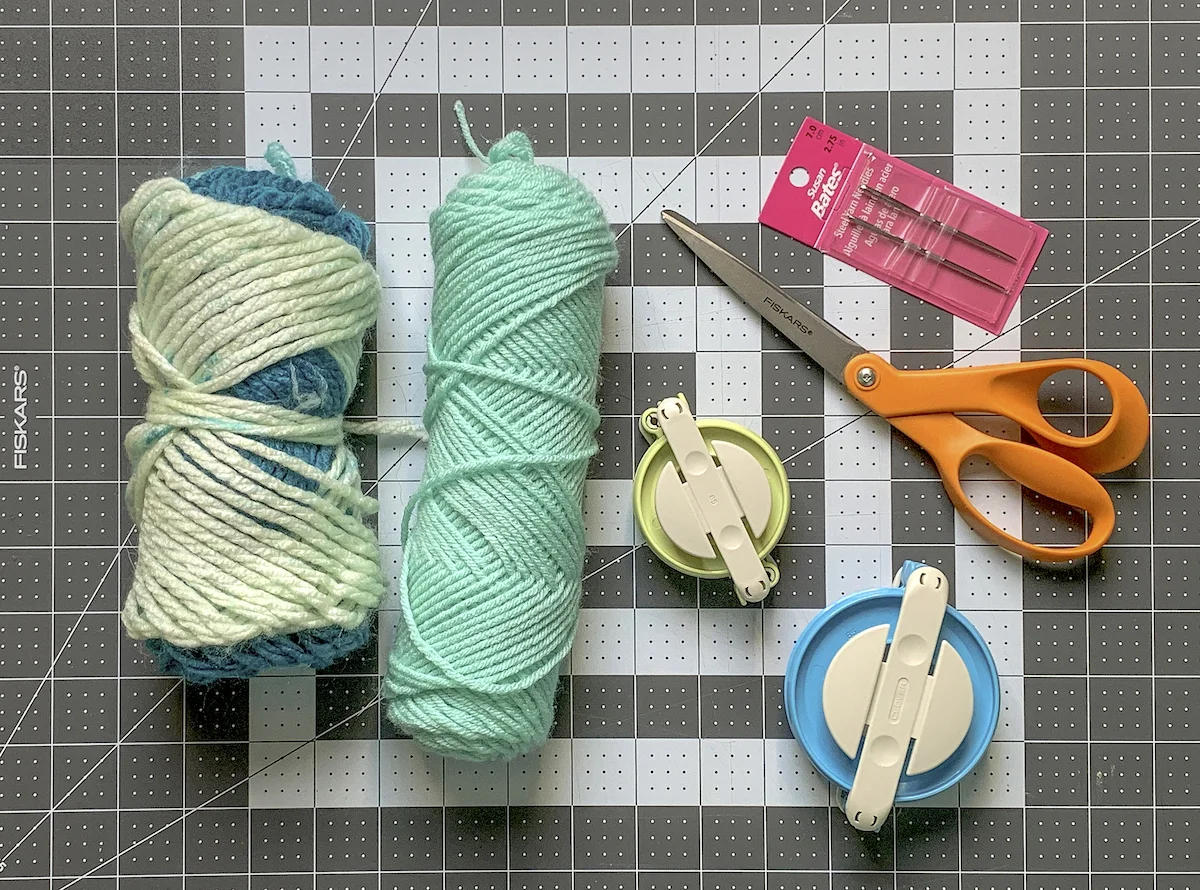
Collect These Provides
Ideas and Ideas for Making Pom Poms
The quantity of yarn you want varies drastically relying on each the dimensions instrument you employ in addition to the load of the yarn. Go to our yarn weight chart to study extra.
Use medium rigidity when wrapping the yarn on the arms of the instrument. You don’t need the yarn too unfastened or too tight. Preserve it taut, however you don’t want a demise grip!
When you make one pom pom, attempt experimenting by combining totally different yarn colours collectively. That’s how one can make totally different shapes and patterns.
Prep Time
2 minutes
Energetic Time
10 minutes
Complete Time
12 minutes
Issue
Simple
Estimated Price
$1
Instruments
Pom pom maker
Scissors
Tapestry needle
Directions
Open one set of the plastic arms of your instrument to the proper.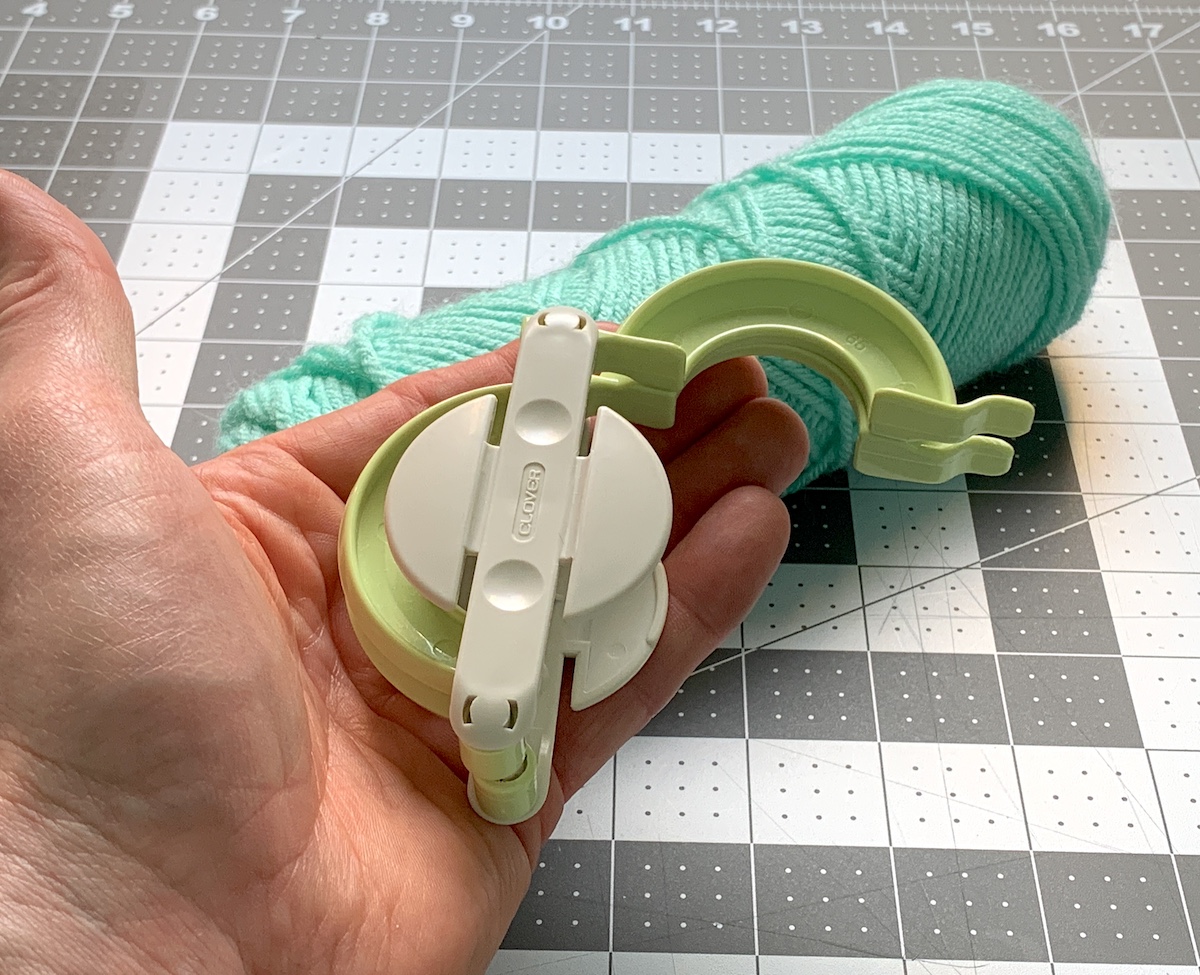 Start wrapping the yarn across the arms of the instrument. Maintain the yarn down wherever and begin wrapping. Work backwards and forwards throughout the arms, as evenly as you’ll be able to.
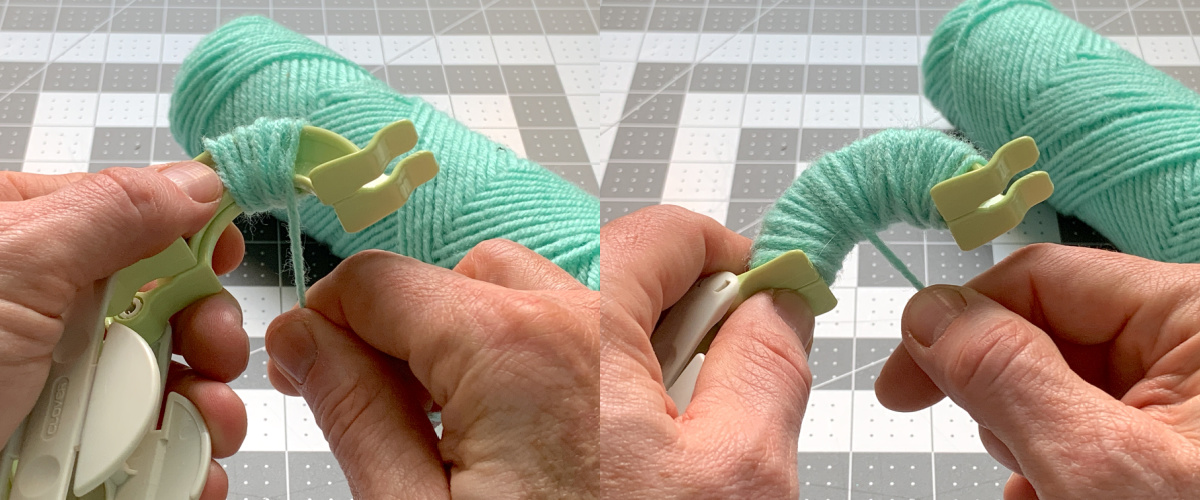 Preserve wrapping till you fill the “U” of the plastic arms. When you’ve wrapped sufficient yarn, carry it out on the proper between the 2 arms and shut the instrument.
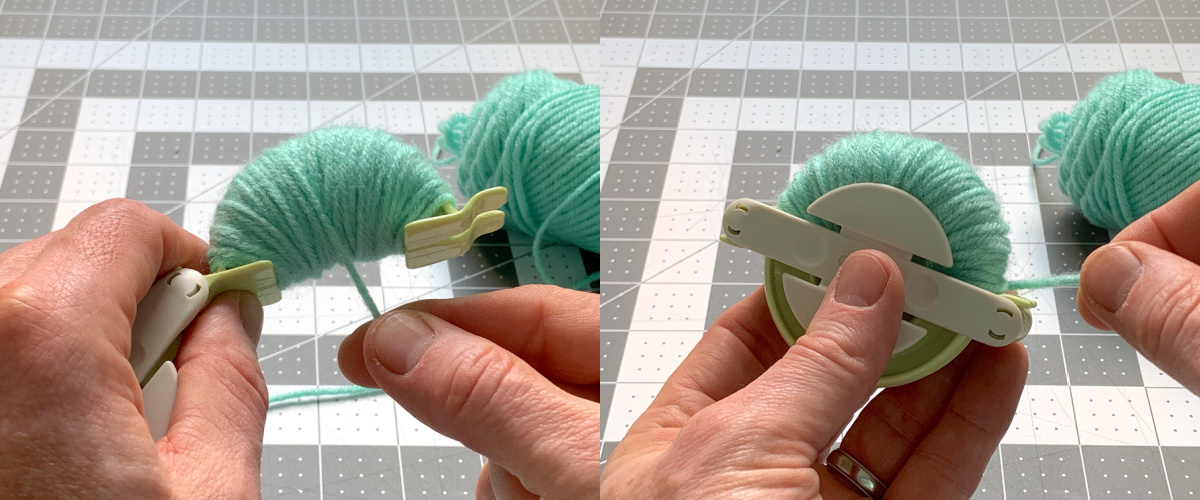 Flip the instrument over and convey the yarn down between the 2 arms on the proper.
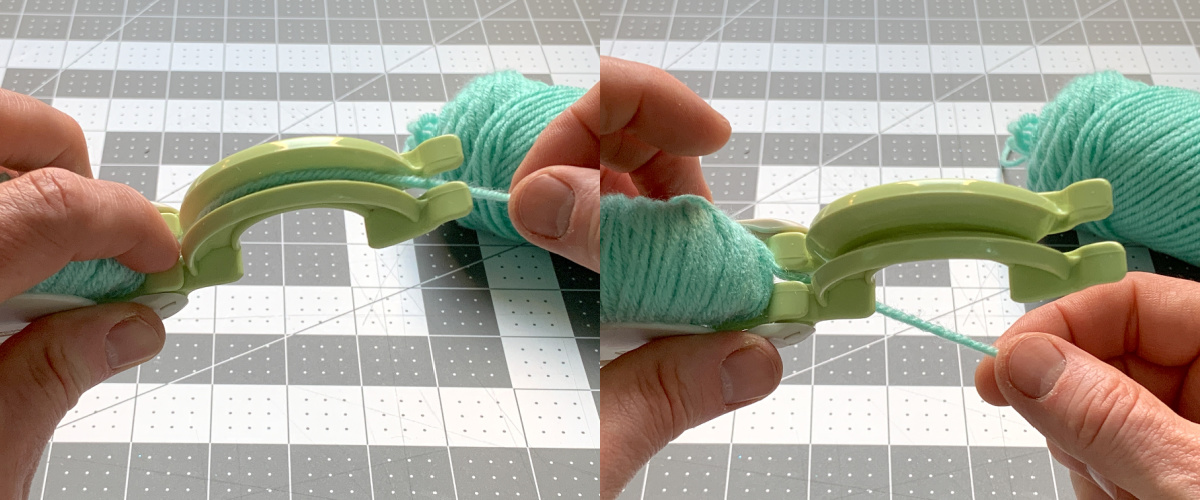 Wrap the yarn across the two open plastic arms as you probably did the primary time, filling the “U” with yarn.
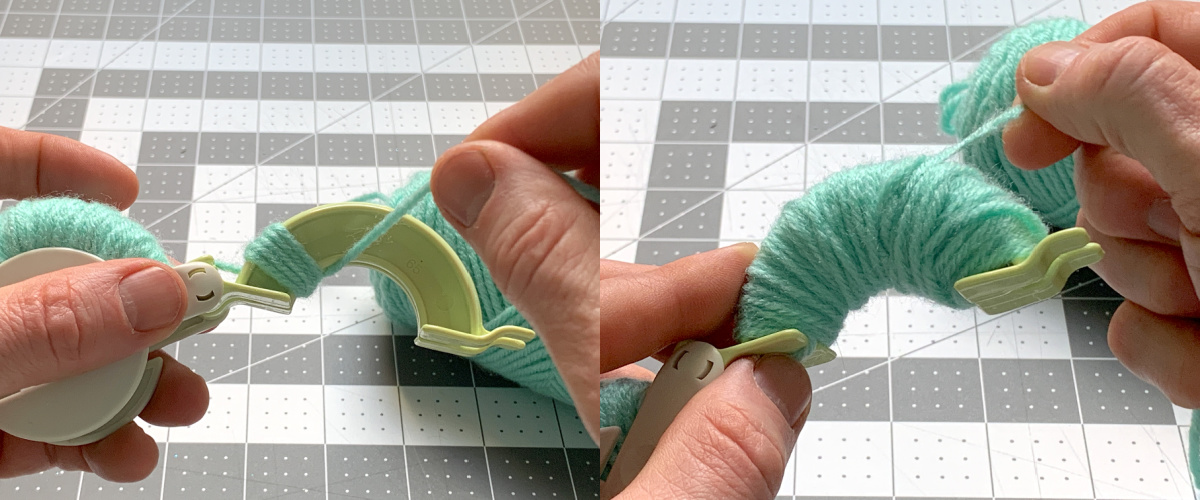 Trim the yarn with scissors, leaving a little bit little bit of an finish. You possibly can shut the instrument.
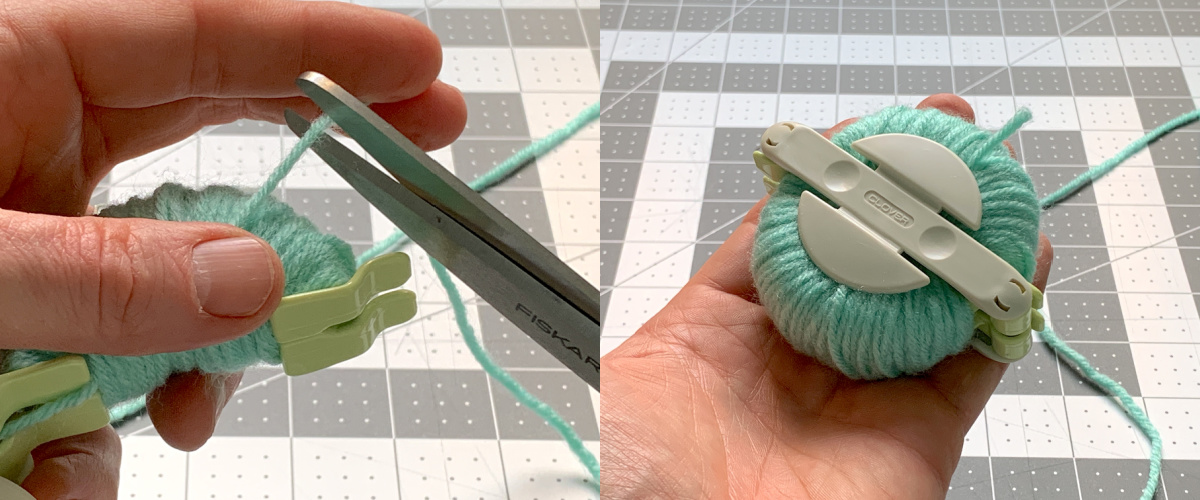 With the instrument closed, you’re going to chop the yarn on each side, down the arms. Preserve the instrument closed so the yarn doesn’t fall out.
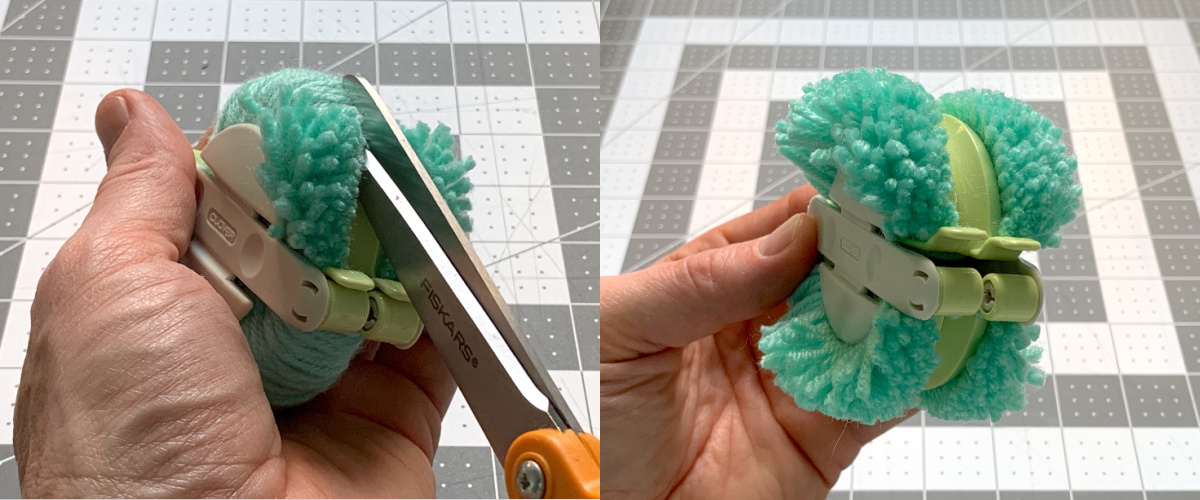 Reduce a protracted size of yarn. Wrap the yarn across the center of the pom pom maker, by way of the hole between the 2. Tie a knot in your yarn, as tightly to the middle as you’ll be able to with out breaking your yarn. Wrap the yarn round once more, and tie one other knot to safe it.
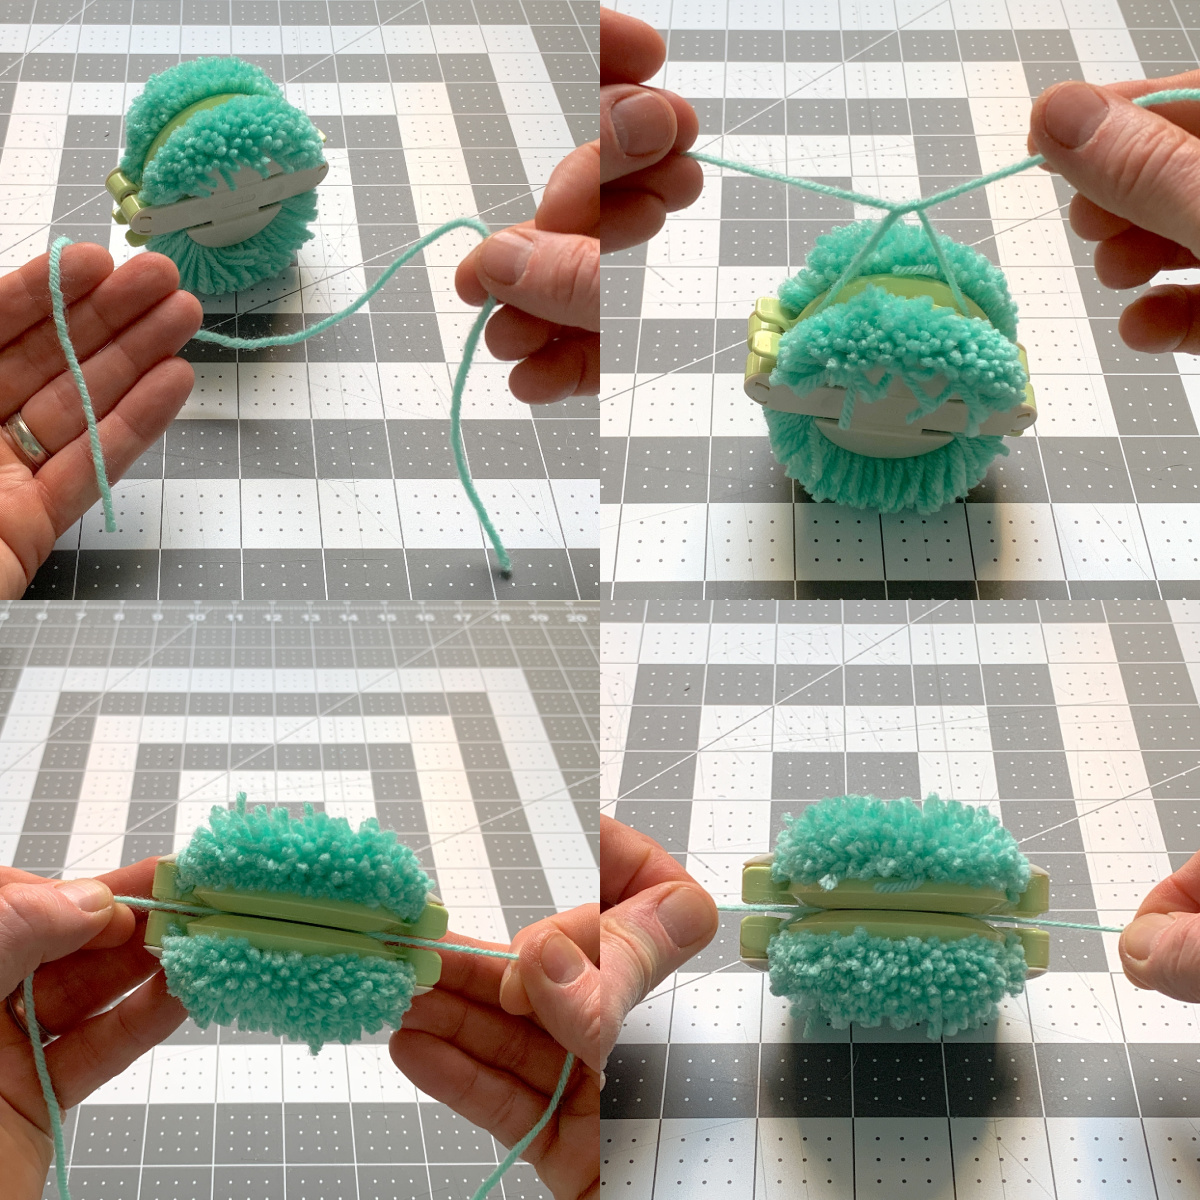 Now you’ll be able to take away the yarn from the instrument with out it falling aside. Open each arms on each side, pull the instrument aside, and take away the pom pom.
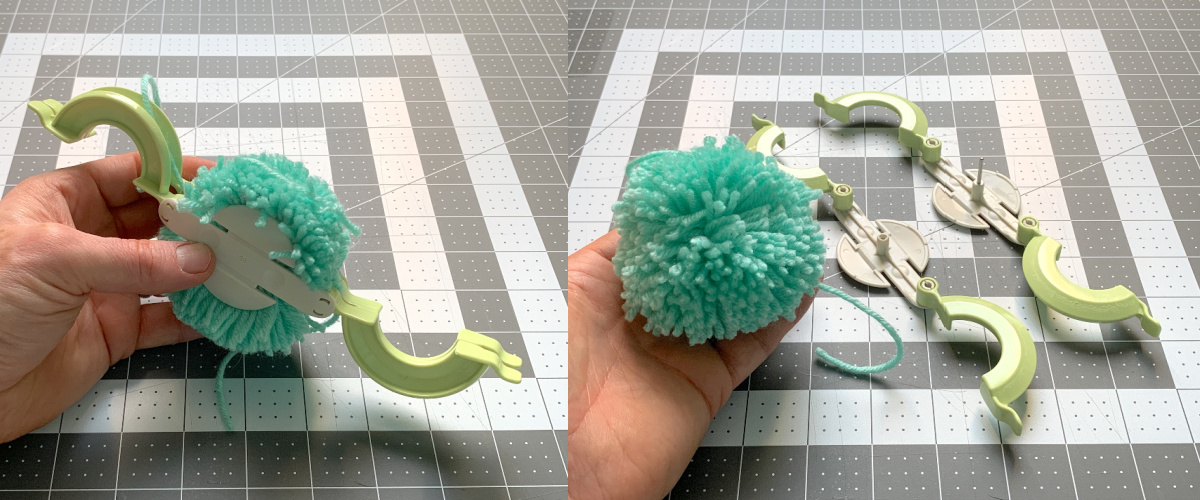 Utilizing your scissors, trim the yarn all around the pom to even the floor. You possibly can reduce off the tails, or use them to tie the pom pom onto one thing.
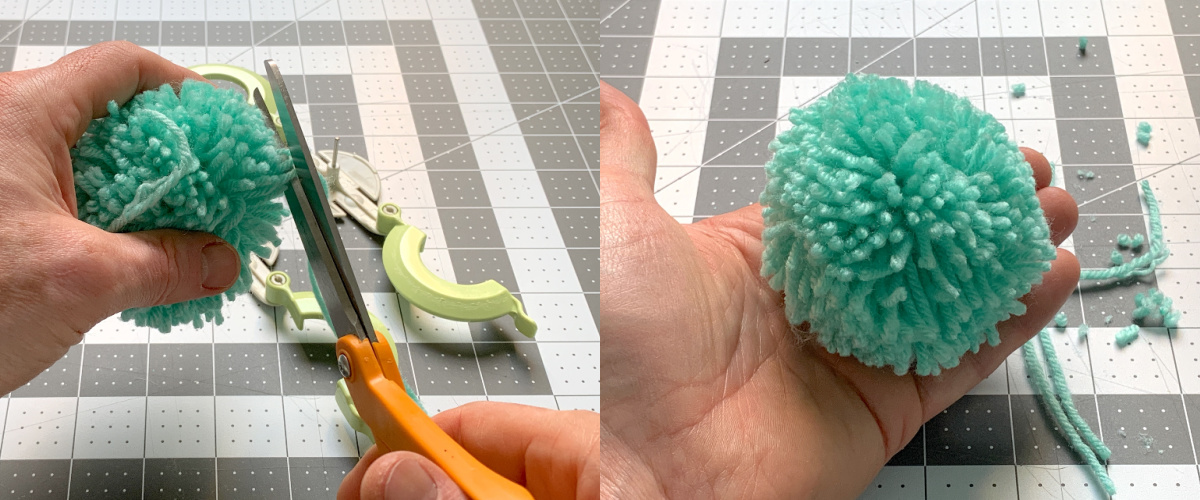
Notes
Price varies drastically for this mission relying on the yarn you employ and what number of pom poms you make. I have been making pom poms with the identical instrument for years, so my price may be very low for one pom.
Now that you understand how to make use of a plastic pom pom maker, I’d love so that you can let me know your expertise within the feedback! Please different try these different crafts that use this instrument:
Fundamental Garland • Fundamental Wreath • Christmas Garland • Christmas Wreath • DIY Owl • Valentine Garland • Wall Hanging
[ad_2]
Source link


")


")


")


